Concrete polishing looks like a single service on a price sheet, but it's actually a multi-stage mechanical and chemical process — a progressive grinding sequence followed by a densifying treatment that transforms raw slab into a durable, reflective floor. Understanding what actually happens at each stage helps you evaluate a quote and know what you're paying for. This is the same process ProEpoxy runs for every concrete polishing project in Denver, adjusted for Colorado's dry climate.
The Diamond Grinding Process Step by Step
Every polished concrete floor goes through the same fundamental sequence — what changes between projects is how many passes are needed and how far the gloss level is pushed. Here's the process from raw slab to finished floor.
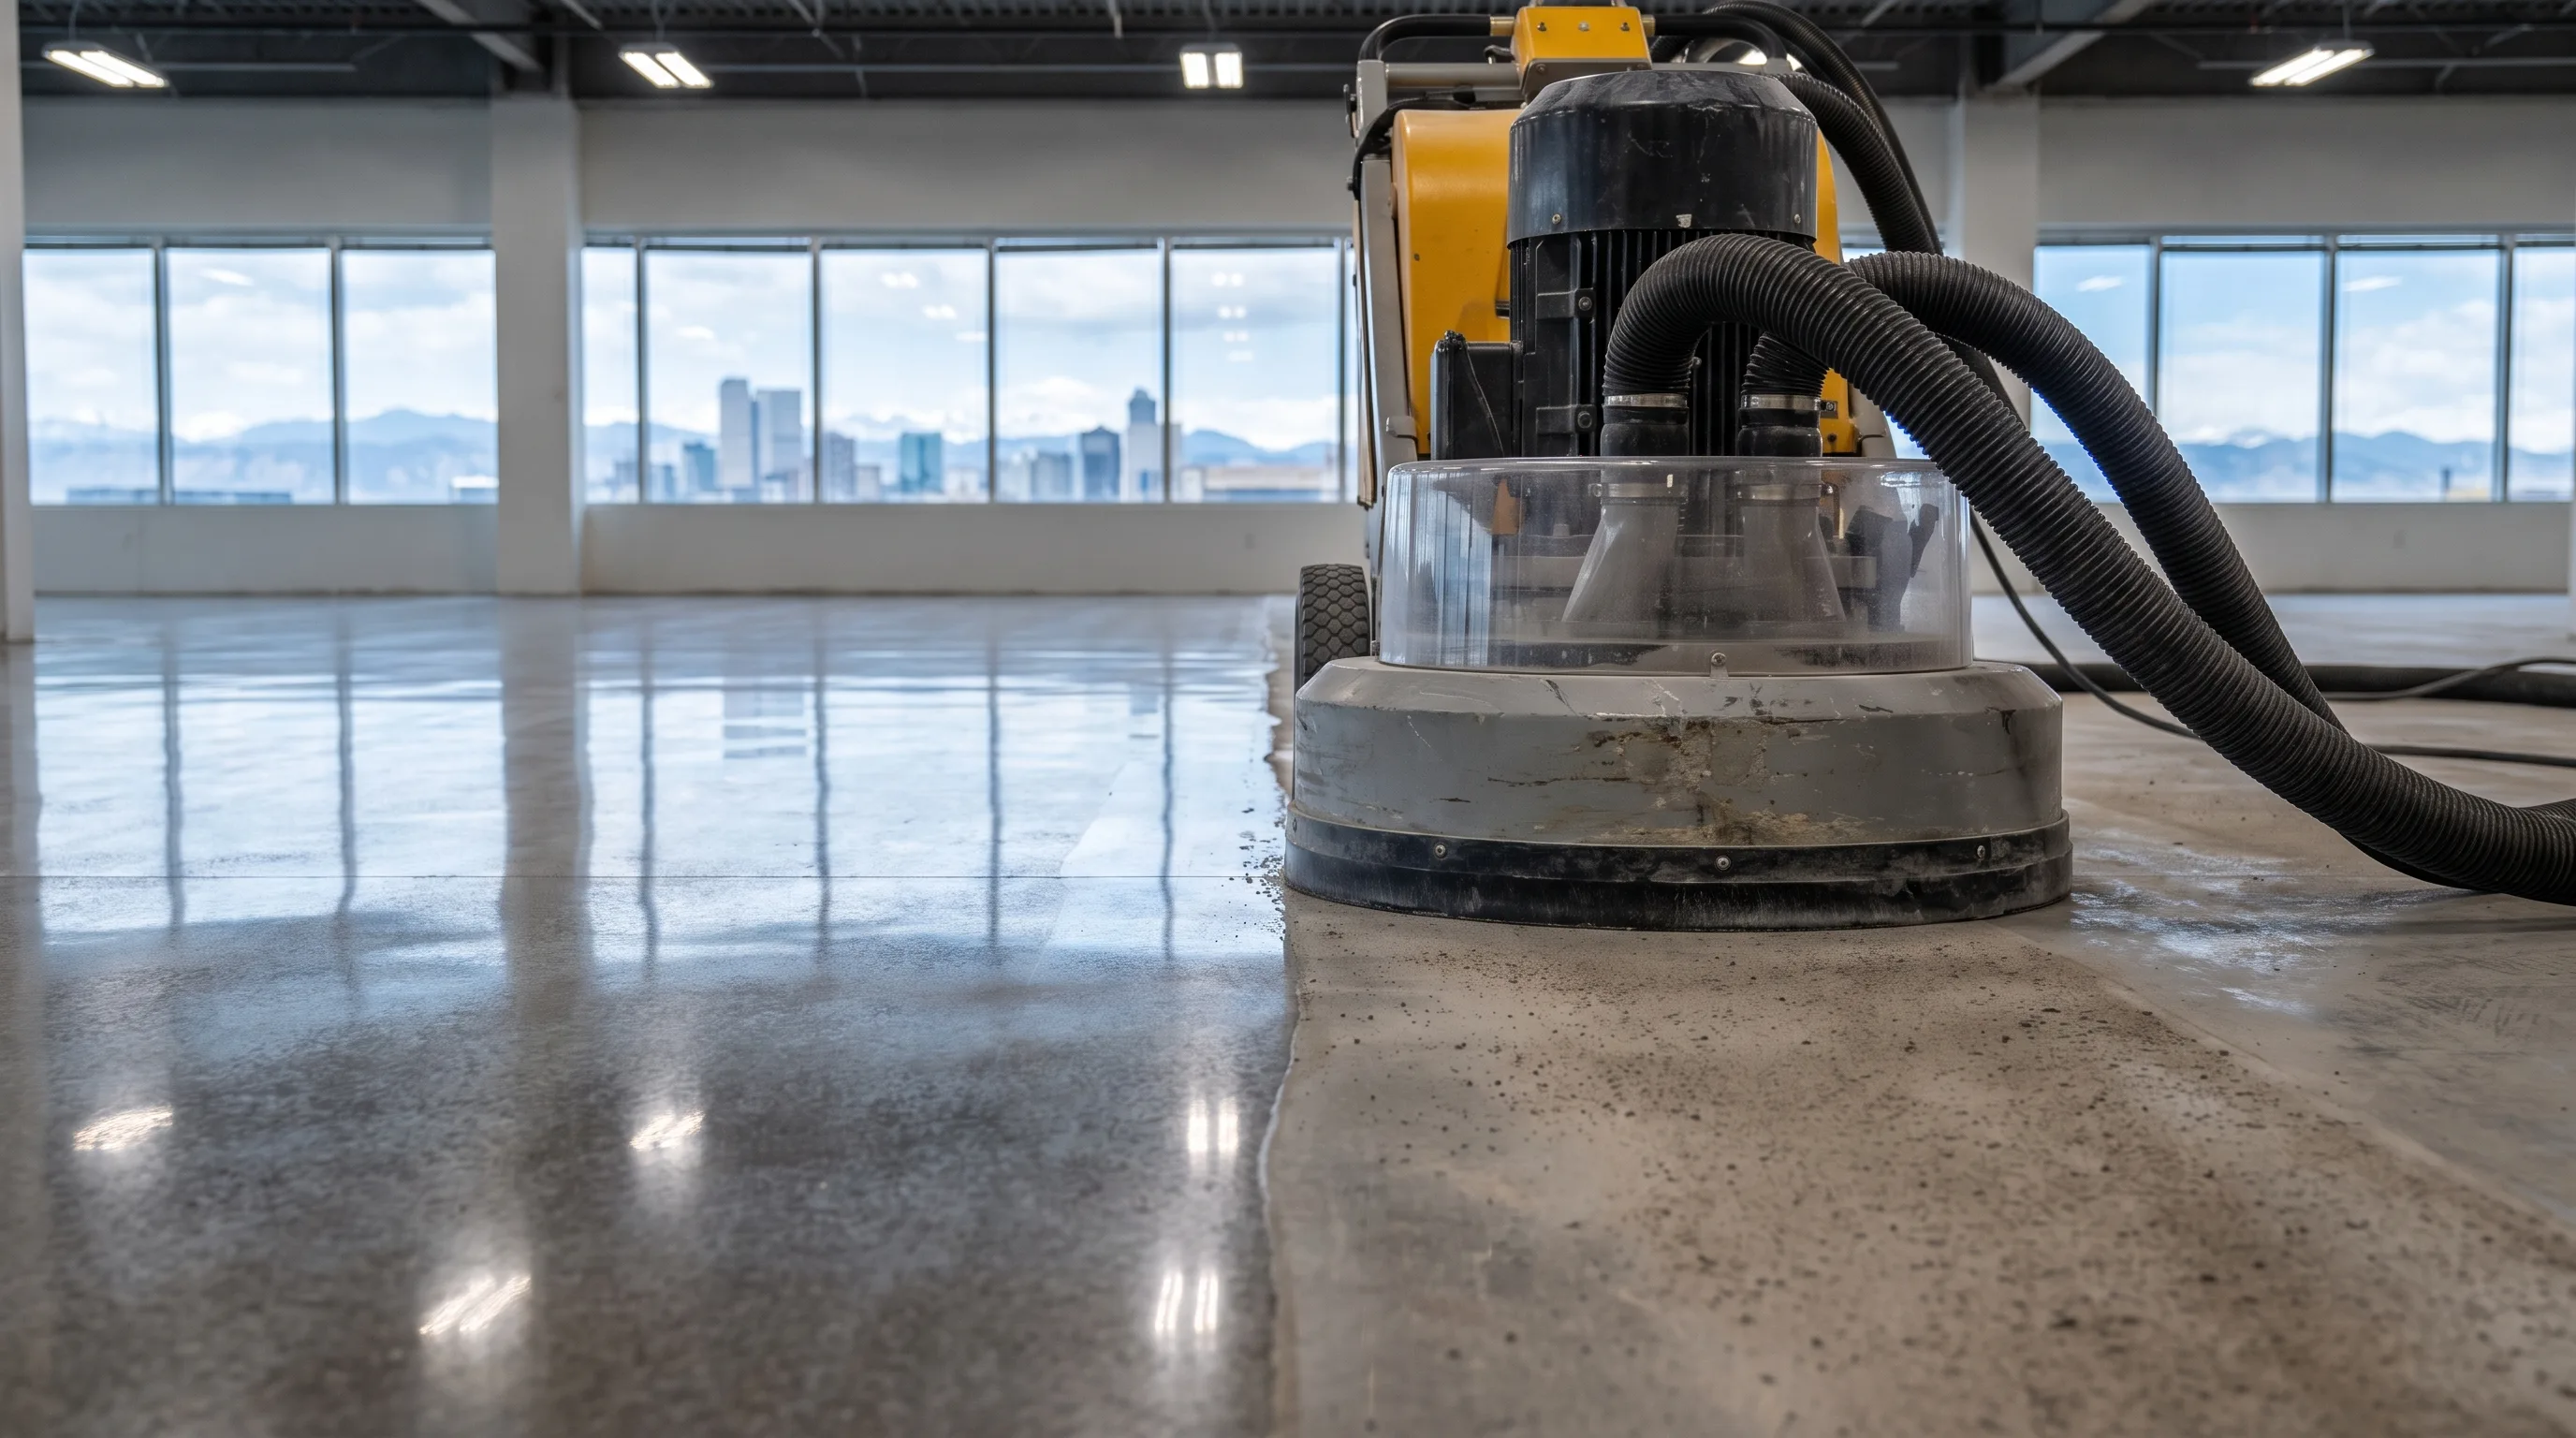
Progressive diamond grinding in action — the glossy finished section shows the result of the full grit sequence.
Densifier and Why Denver's Dry Climate Helps
The densifier stage is where a lot of the floor's long-term durability actually comes from — it's a chemical reaction, not just a coating sitting on top of the slab. The silicate solution penetrates the concrete's pore structure and reacts with calcium hydroxide (free lime) to form calcium silicate hydrate, which is denser and harder than the surrounding material.
Denver's low humidity is a genuine advantage here. Densifier penetration and cure both benefit from drier conditions — in more humid climates, excess moisture in the slab can limit how deeply the densifier penetrates before it reacts at the surface. Colorado's dry air lets the chemistry work more completely through the depth of the pass, which shows up as better final reflectivity and a harder wear layer. It's one of the few places where Denver's climate works in a contractor's favor rather than adding a complication to plan around — most of the guides on this site are about compensating for altitude and UV, but polishing is the one service where the region's dryness is a straightforward net positive with no tradeoff to manage.
One caveat: extremely dry conditions can also mean the slab needs light misting during aggressive grinding passes to control dust and prevent the diamond tooling from overheating — a detail an experienced crew manages as part of the process, not something that changes the outcome.
Gloss Levels From Matte to Mirror
Gloss level is a spec, not a guess — it's controlled by how far the grit progression goes and whether a guard coat is applied. Here's what each level actually looks like and where it's typically specified.
Cost by Square Footage
Polished concrete pricing scales with the gloss level targeted and the condition of the existing slab — a clean, crack-free slab costs less to prep than one needing repair before grinding starts.
| Gloss Level | Best For | Cost / Sq Ft |
|---|---|---|
| Matte / SatinLower grit progression | Warehouses, industrial | $3 – $5 |
| Semi-GlossMid-range grit + densifier | Retail, light commercial | $5 – $7 |
| High-GlossFull progression + burnish | Showrooms, residential | $7 – $10 |
| Slab RepairCrack fill if needed | Assessed on-site | Varies by scope |
Common Mistakes That Ruin a Polish Job
Polished concrete looks straightforward from the outside — grind, densify, buff — but the finished result is unforgiving of shortcuts. A few mistakes account for almost every disappointing polished floor we're asked to fix or redo.
- Skipping grit steps. Jumping from a coarse grit straight to a fine one leaves the coarser scratch pattern visible under the final sheen — you can't polish over a skipped step, you have to go back and redo it.
- Applying densifier too early or too late. Densifier needs to go on at the right point in the grit progression to penetrate properly. Applied too early, subsequent grinding removes the hardened layer; too late, it doesn't penetrate as deeply.
- Ignoring aggregate exposure goals. How much of the underlying aggregate shows through the finish is a design choice made early in the grinding sequence — deciding it midway through means starting the coarse passes over.
- Underestimating slab condition. A slab with significant cracking, inconsistent pours, or old adhesive residue needs repair before grinding starts. Polishing over those issues telegraphs them straight into the finished floor.
- Rushing the burnish pass. The final high-grit pass is what actually creates reflectivity — rushing it to save time is the most common reason a "polished" floor comes out looking merely ground.
The other factor that separates a good polish job from a mediocre one is equipment — professional-grade planetary grinders maintain flat, consistent pressure across the whole slab in a way that smaller rental equipment can't, which shows up directly in how even the final gloss looks under raking light. A floor polished with underpowered or single-head equipment often shows subtle waviness or inconsistent sheen once furniture and fixtures are moved in and the space is lit from multiple angles — a flaw that's hard to see on an empty slab but obvious once the space is finished and occupied.
Maintaining a Polished Concrete Floor
One of the strongest selling points of polished concrete is how little it asks for afterward. Routine maintenance is a dust mop or auto-scrubber on a normal cleaning schedule — no waxing, no periodic stripping and resealing like VCT or some sealed concrete alternatives require. An occasional damp mop with a pH-neutral cleaner keeps the surface looking like day one.
The densifier treatment is permanent — it's a chemical reaction within the slab, not a topical layer that wears off — so the floor's core hardness doesn't degrade over time the way a coating can. What can dull over years of heavy traffic is the surface gloss, and that's addressable with a re-burnish pass rather than a full recoat, which is a fraction of the cost and disruption of redoing a coated floor. That's part of why polished concrete routinely reaches 20+ years of service life with only periodic light maintenance rather than a scheduled recoat cycle.